How to Make Climbing Holds
 As the author and as an Amazon Associate I earn a commission from qualifying purchases which help support the operating costs of this site.
Is it cheaper to make your own climbing holds?
For high quality fiberglass holds, the answer is no. It's cheaper and safer to buy your holds. See climbing holds.
Wood holds made from the 2x4 scraps of your climbing wall project are an inexpensive way to get your wall started. They are easy to shape and you have to do something with the scraps anyway... and if you are over budget by this stage these wooden holds are a temporary way to get your wall started.
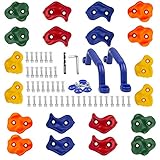
Rock climbing holds are made of epoxy and fiberglass with fine silica sand for texture and friction. Synthetic rock climbing holds are the most popular, but wood and real rock holds can also be found. It is relatively easy to pick out a set of holds to target a specific climbing training need. Every type of climbing hold is available--slopers, crimpers, mono, jugs, jibs, ect.
It is not difficult to make climbing holds. Holds can be easily made out of rock or wood. The best quality climbing holds are made from epoxy, fiberglass and sand. Here are some general steps to make your own holds.
To make an epoxy or silicone climbing hold:
1. Make a prototype shape: Use foam, clay, wood or any material that can be easily shaped. Create the shape of the hold but cutting the foam, clay or wood. Put the shape into a small cardboard box. The box should be nearly the same size as the mold. Seal any cracks in the box with glue.
2. Make a mold of the prototype. Prepare a silicone rubber mixture and pour it into the box. The rubber encapsulates the prototype. There are many silicone rubber products available for purchase. Purchase a liquid rubber such as Silicone, Polysulfide, and Polyurethane. These products are mixed as a liquid. The product hardens after time to form a rubber mold. Mix and pour the liquid rubber in the mold box. Completely cover the prototype with the liquid rubber. The liquid rubber will harden in approximately one day. Remove the rubber from the box. Remove the prototype from within the rubber. The rubber is left with a cavity. The cavity is the shape of the prototype climbing hold.
3. Make a climbing hold from the mold. Mix the epoxy/fiberglass/sand. Follow manufacturer's directions for mixing. Pour the epoxy resin into the cavity of the mold. Experiment with this process. You will be able to make very interesting climbing hold shapes for your climbing wall.
To make a climbing hold using wood:
When you make your own climbing wall you will have lots of scrap wood left over. Gather the pieces and scraps together and sort them by size. Eliminage the scraps that have the grain running the wrong direction, towards the wall. In other words, you want the grain of the hold running with the direction of the wall, parallel to it. This is because the hold will be held in using screws. Screws will not hold well if they run with the grain.
Carefully using a jig saw or circular saw cut out angled shapes a little larger than the size you need. Sand the hold to remove rough edges and create interesting shapes.
Pre-drill holes and countersink the opening for the screw. The purpose of the pre-drilling and counter sinking is to reduce stress on the inner grains of the wood. This is really an important step. If you try to screw the hold to the wall without pre-drilled hole or countersinking you will split the wood. If you don't countersink the hold the screw head will stick up and could cut your hand.
Pros. Making your own wood holds if by far less expensive than commercial holds. They are almost no cost to you, except for the sandpaper, or purchase price of a rotating attachment for your drill.
Cons. There's a downside to making wood holds. Over time they will weaken and need to be replaced. Be sensitive as you grip them, feel for movement of the hold within the screw setting. You can't over tighten them or they will break. They are not well suited for foot holds or dynos. They can be used effectively for balance work but not huge movements.

Using a rotating sander attachment on your drill, shape the climbing hold. With a sandpaper grit of about 80 you can shape it quickly.
Cut the block so the grain runs parallel to the ground when installed on the wall. If the grain is running vertically the screw may pull through the grain vertically. If the grain runs from the wall to a direction away from the wall -- in otherwords, perpendicular to the wall the screw won't hold well.

The finished shape can really be anything you want. Just be sure the grain of the wood is running parallel to the wall, and at a right angle to the direction of the two screws holding it on.
Smooth edges so it is comfortable to grip and sand the sides flat. You can even put in small finger depressions or other texture if you like.

These were completed in about three hours. You can suppliment your holds collection and use up some of your scrap wood by making your own holds.

Two screws should be used to fix the hold to the wall. The screw hols must be pre-drilled and the opening countersunk.
As an Amazon Associate I earn a commission from qualifying purchases which help support the operating costs of this site.


Also see: